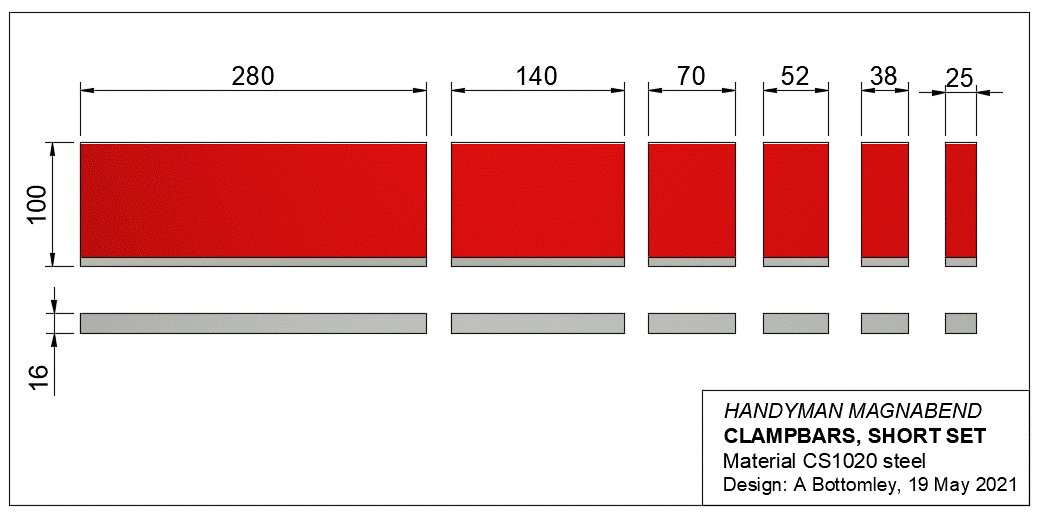
| MAGNABEND HANDYMAN MODEL |

The easy exchangability of clampbars is a very strong feature of the Magnabend concept.
The illustration below shows:
- A Slotted Clampbar,
- A Plain Clampbar,
- A Narrow Clampbar,
- A Clampbar Short Set.

As well as for making boxes and trays the Slotted
Clampbar is also fine for plain folding.
It might be thought that the existence of the slots would mar
the finished fold where the bend spans across the slots. But the slots
do not show up at all, even when folding very thin sheet metal.
For making boxes and trays the slotted clampbar allows for ALL SIZES up to 635mm long. (For a very few sizes it is necessary to use an end of the clampbar as a virtual slot). The boxes and trays can be up to 50mm deep. For deeper boxes it is suggested to make the box with separate end pieces, see this section.
However if you really need to make deep boxes out of a single piece of sheet metal then you will need the set of Short Clamp bars. There is no limit to the depth of box that can be made with the short clamp bars.
If you don't need to make boxes at all then you may choose to furnish your machine with just the Plain Clampbar.
The Narrow Clampbar might be needed for some smaller specialised shapes. One example would be small top-hat sections. See here for instance. The Narrow Clampbar has a more limited bending thickness capacity of about 1mm.
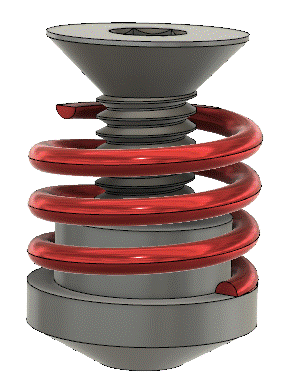
Lifter/Locator Mechanism
For the HANDYMAN Magnabend a simplified lifter/locator mechanism has been developed for the clampbars. Also these lifters do not project above the the top surface of the the clampbar and thus it is possible to use the clampbar upside down.
 These units install in each end of the
clampbars and serve to lift and locate the clampbar following each bend
cycle.
These units install in each end of the
clampbars and serve to lift and locate the clampbar following each bend
cycle.
With these lifters the fore and aft adjustment of the clampbar
is achieved by sliding the clampbar left or right whilst the locators
ride in angled grooves.
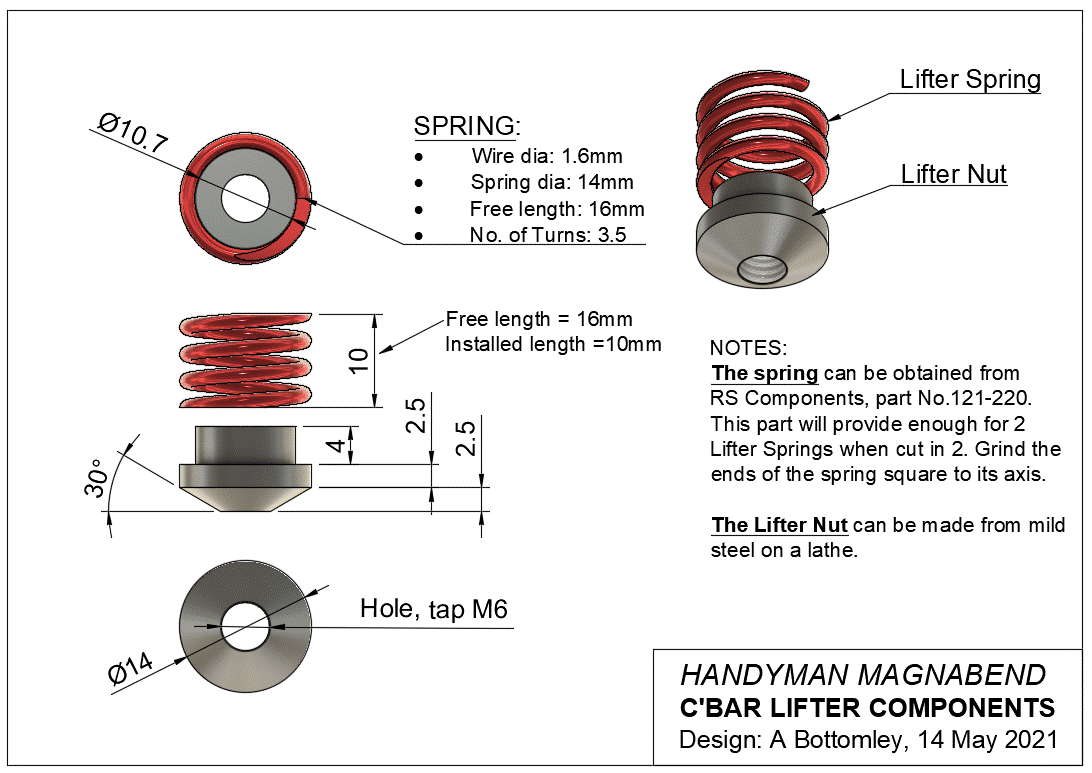
Clampbar, Lifter Components
(Click on the drawing to enlarge):
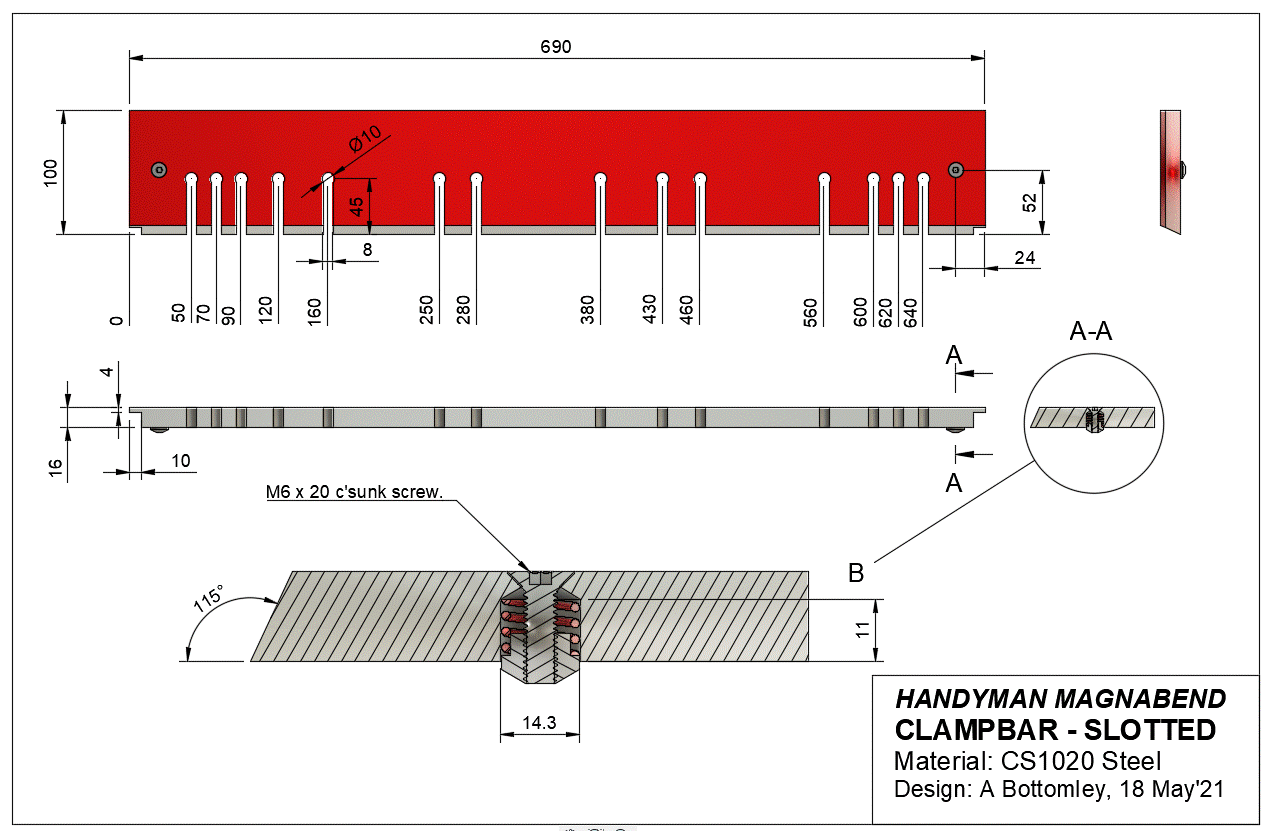
Clampbar, Slotted (Click on the drawing
to enlarge):
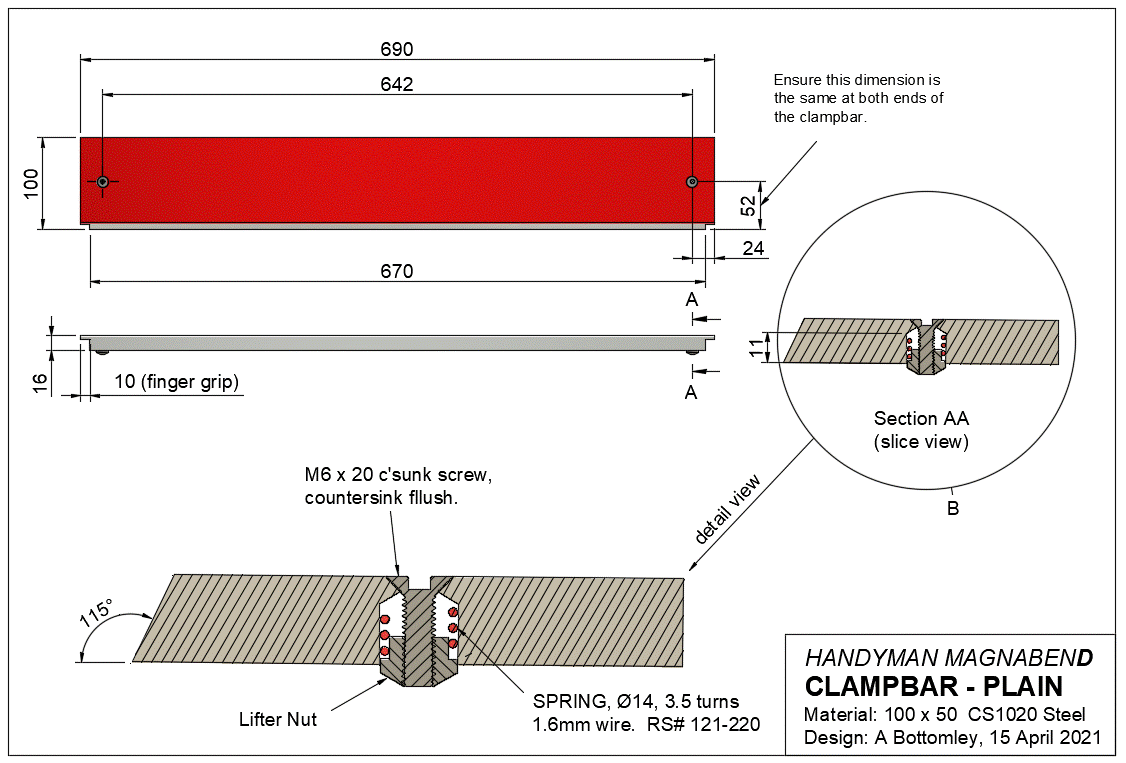
Clampbar, Plain (Click on the drawing to enlarge):
Clampbars, Short Set (Click on the drawing to enlarge):
Manufacturing Tips :
Making the clampbars will normally require some milling, particularly for making the bevel. However it is possible to achieve the bevel by slicing thru the clampbar with a band saw or with a metal abrasive disc mounted in a tilting-arbour saw bench. It has even been done by flame cutting!
But milling achieves the best results and it is even possible to do this operation on an ordinary mill-drill as shown in the photos below:
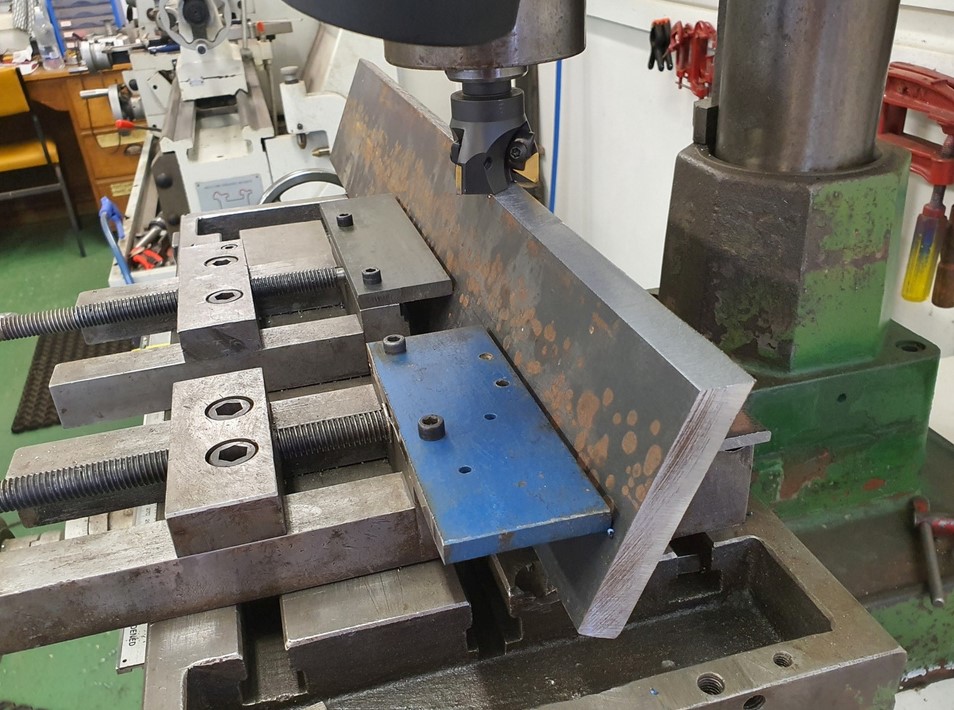
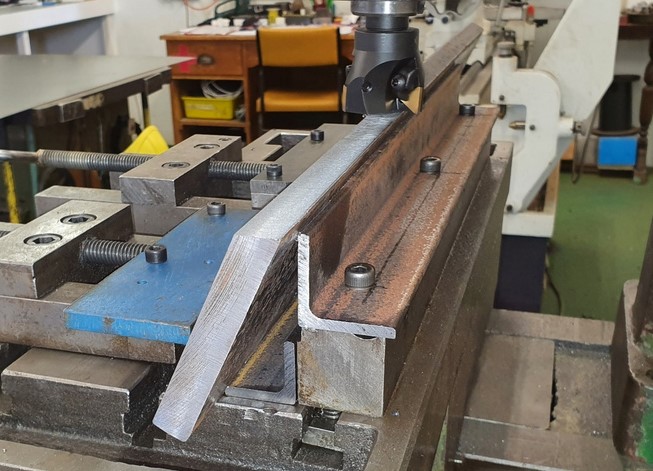
Light cuts will be needed and unless you have a large mill-drill, more than one setup could be needed.
You need to build a supporting structure to hold the workpiece at the correct angle (25 degrees), but once you have this structure then the actual milling does not take very long. (Click on the pictures to see more detail).
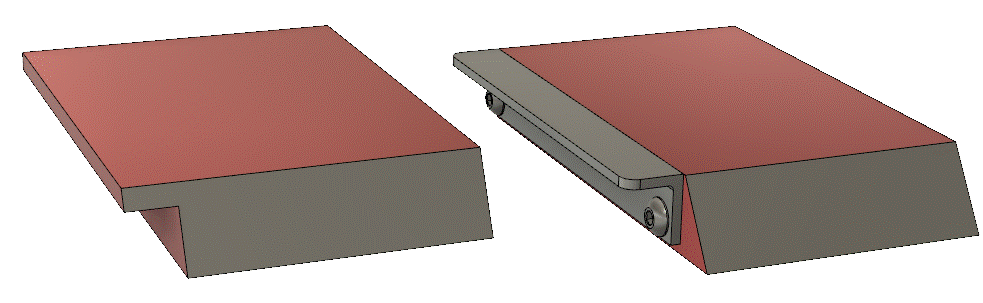 Finger Grips:
The finger grips at each end of the clampbar are best achieved by milling, although it is also possible to fabricate the finger grips.
At right is shown a milled finger grip and a fabricated finger grip.
Hammer-screws would be suitable for fastening the finger grip.
It is most important to provide the long clampbars with finger grips; it makes handling easier and much safer.
Special Tooling
It is very easy to make special tooling for the Magnabend.
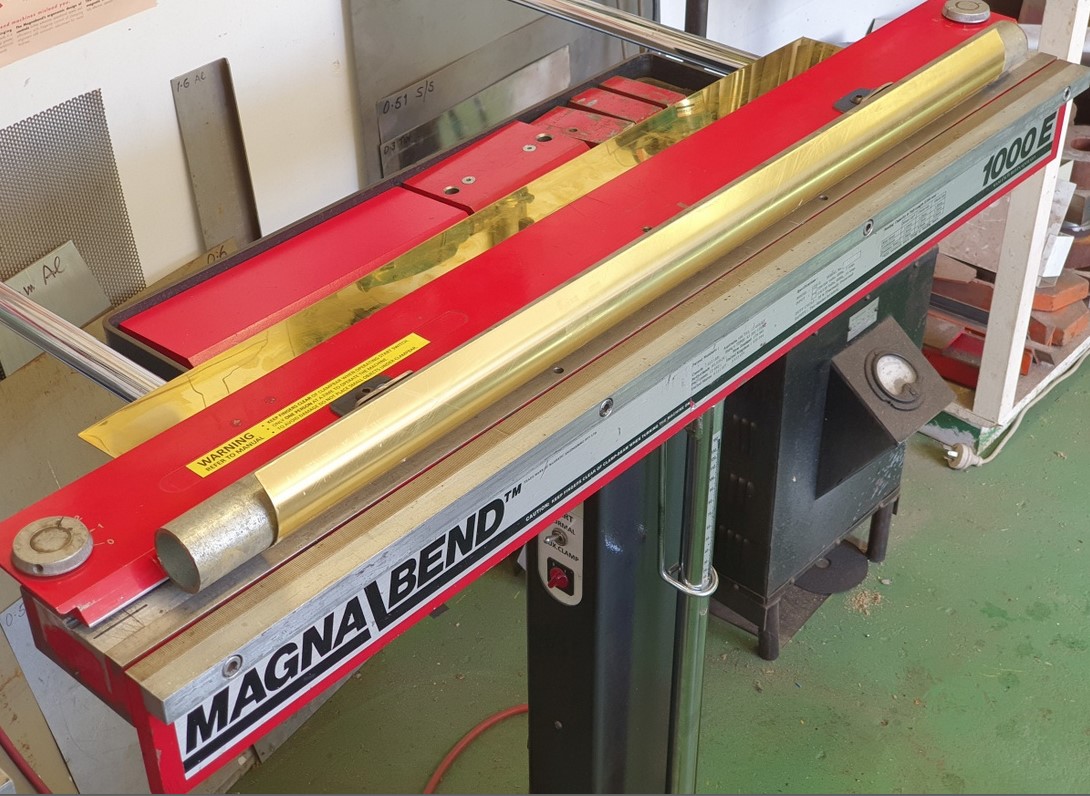
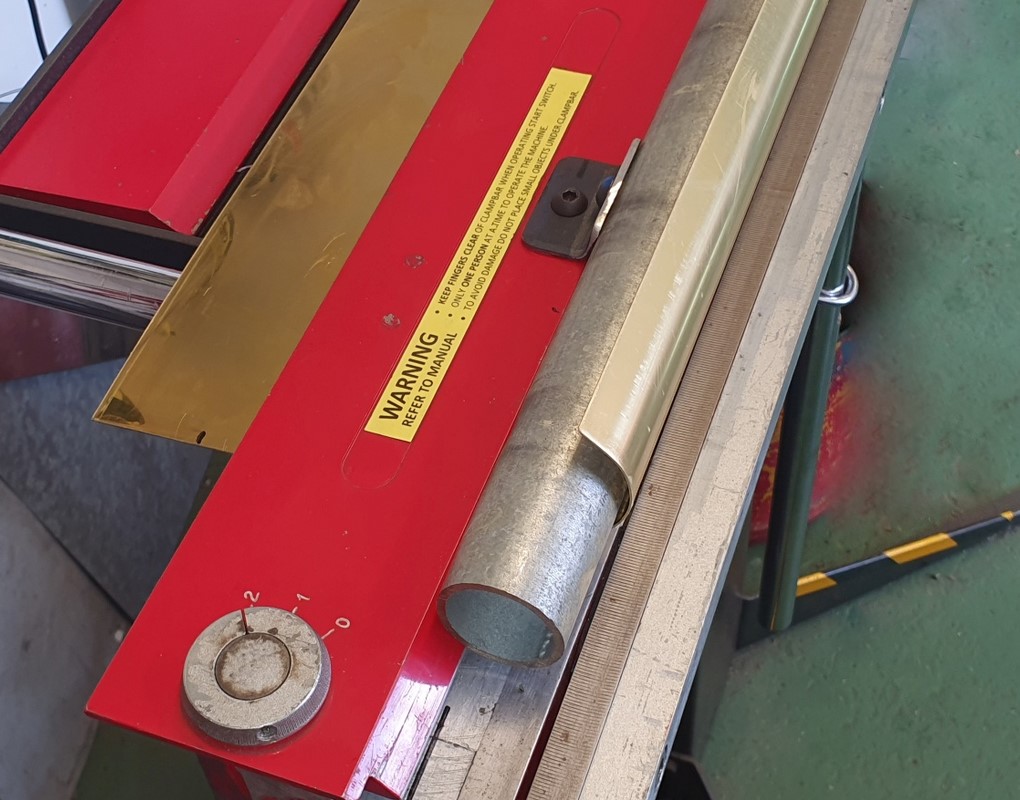
In the example below a bull-nosed brass step cover is being formed from 1.0mm thick brass.
The special tooling consists of just a length of pipe attached to the front of the clampbar via 2 cleats.
For thinner workpieces the cleats may not be necessary as magnetic clamping could be sufficient to hold the pipe in place.
(Click the pictures to see more detail).
There are a myriad of possibilities for special tooling for the Magnabend. See also this section.
"Handyman" Index page.
Contact Alan Magnabend Homepage Alan's Homepage